
Easy Halloween Chocolate Bark Recipe for Spooky Season
Please note, this post may contain affiliate links. Visit Devine Fairytale’s Disclosure Policy for more details.
When October rolls around, it’s all about costumes, candy, and creepy-cute fun. And one of the easiest ways to add a little spooky season magic to your kitchen is whipping up a colorful batch of Halloween chocolate bark.
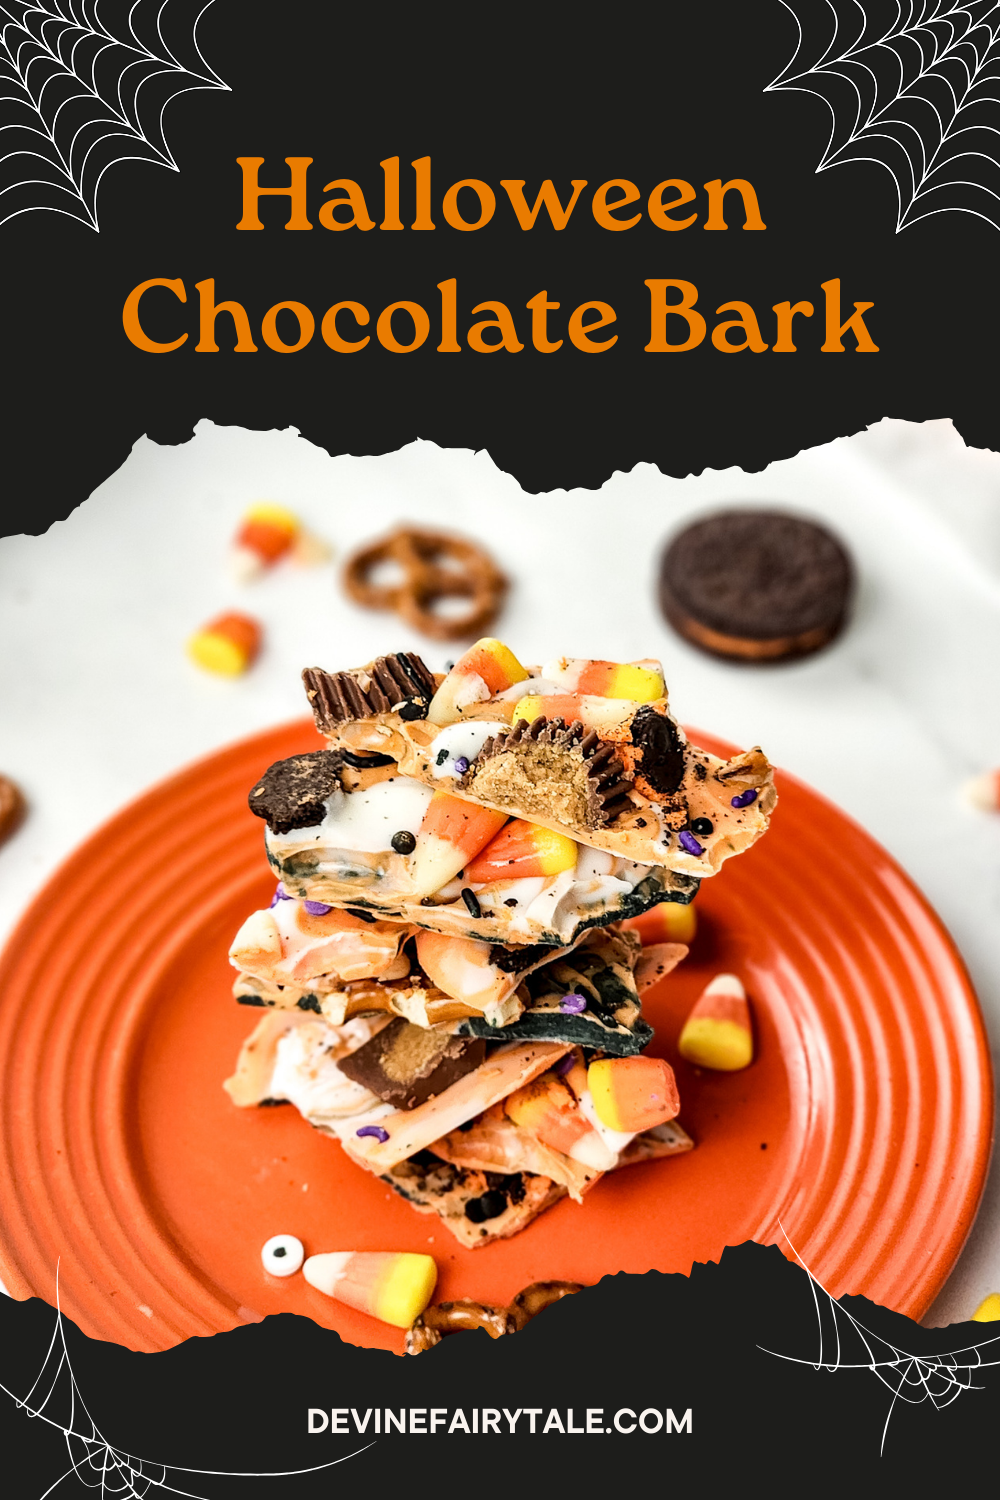
This Halloween chocolate bark recipe is a festive twist on a classic, with bold black and orange swirls, crunchy salty mix-ins, and sweet surprises in every bite. It is no-bake, kid-friendly, totally customizable, and takes about twenty minutes of active work before the fridge does the rest.
Whether you’re planning a haunted house party, need something sweet for a classroom snack, or want to treat yourself to something special while watching Hocus Pocus for the hundredth time, this chocolate bark will do the trick.

What Makes This Halloween Chocolate Bark Recipe So Good
If you have never made chocolate bark before, the concept is simple. You melt chocolate, spread it on a sheet pan, scatter on toppings, and let it set. Once it firms up, you break it into jagged pieces that look like you spent way more time on them than you actually did.
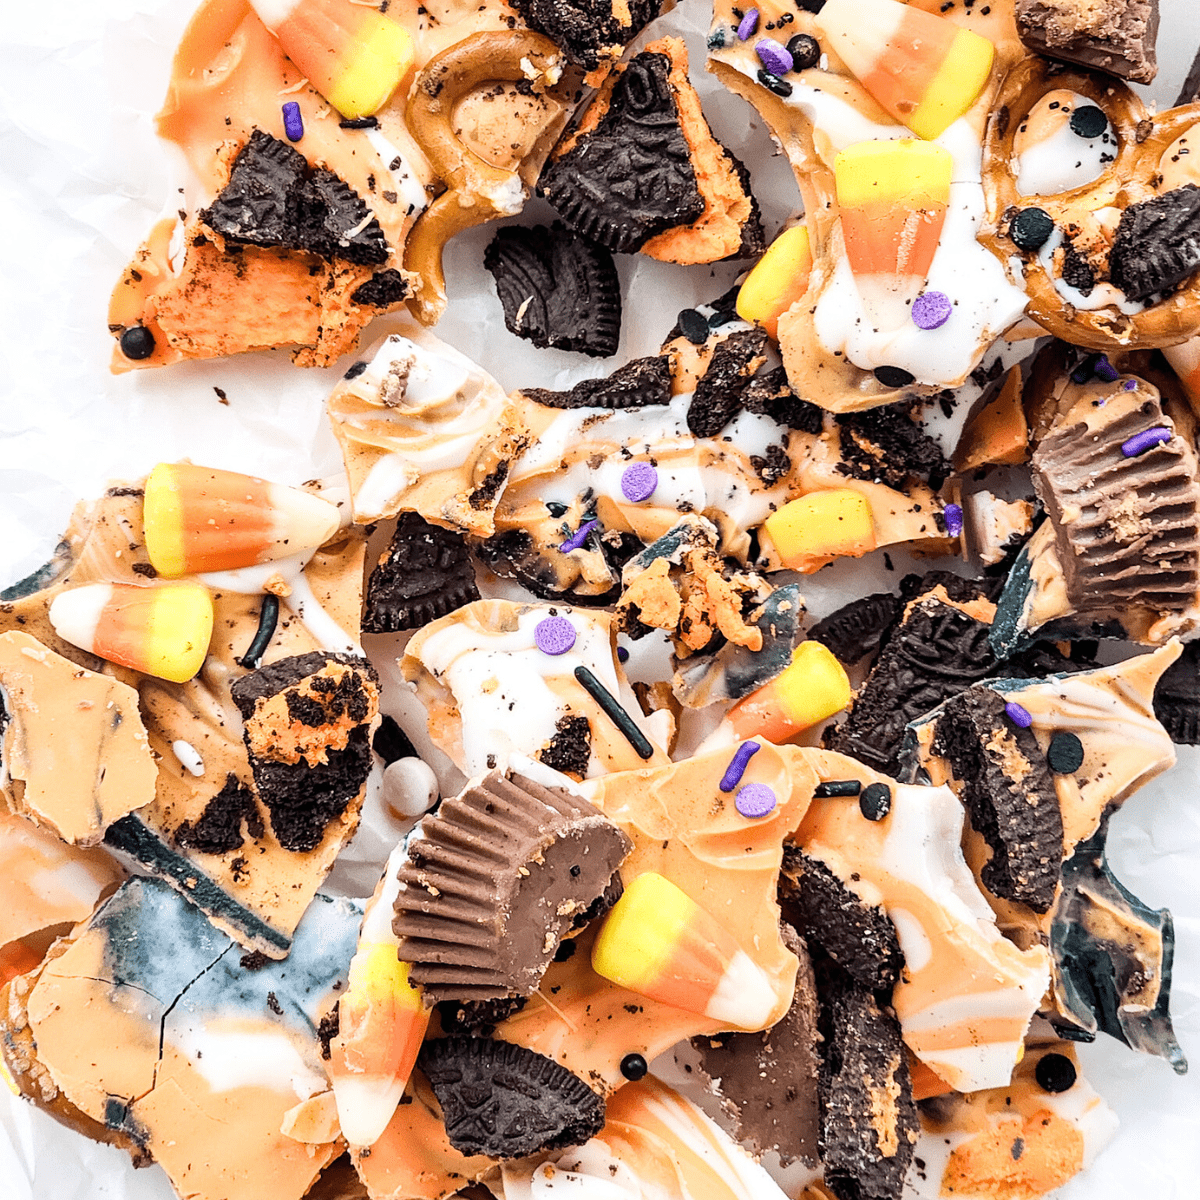
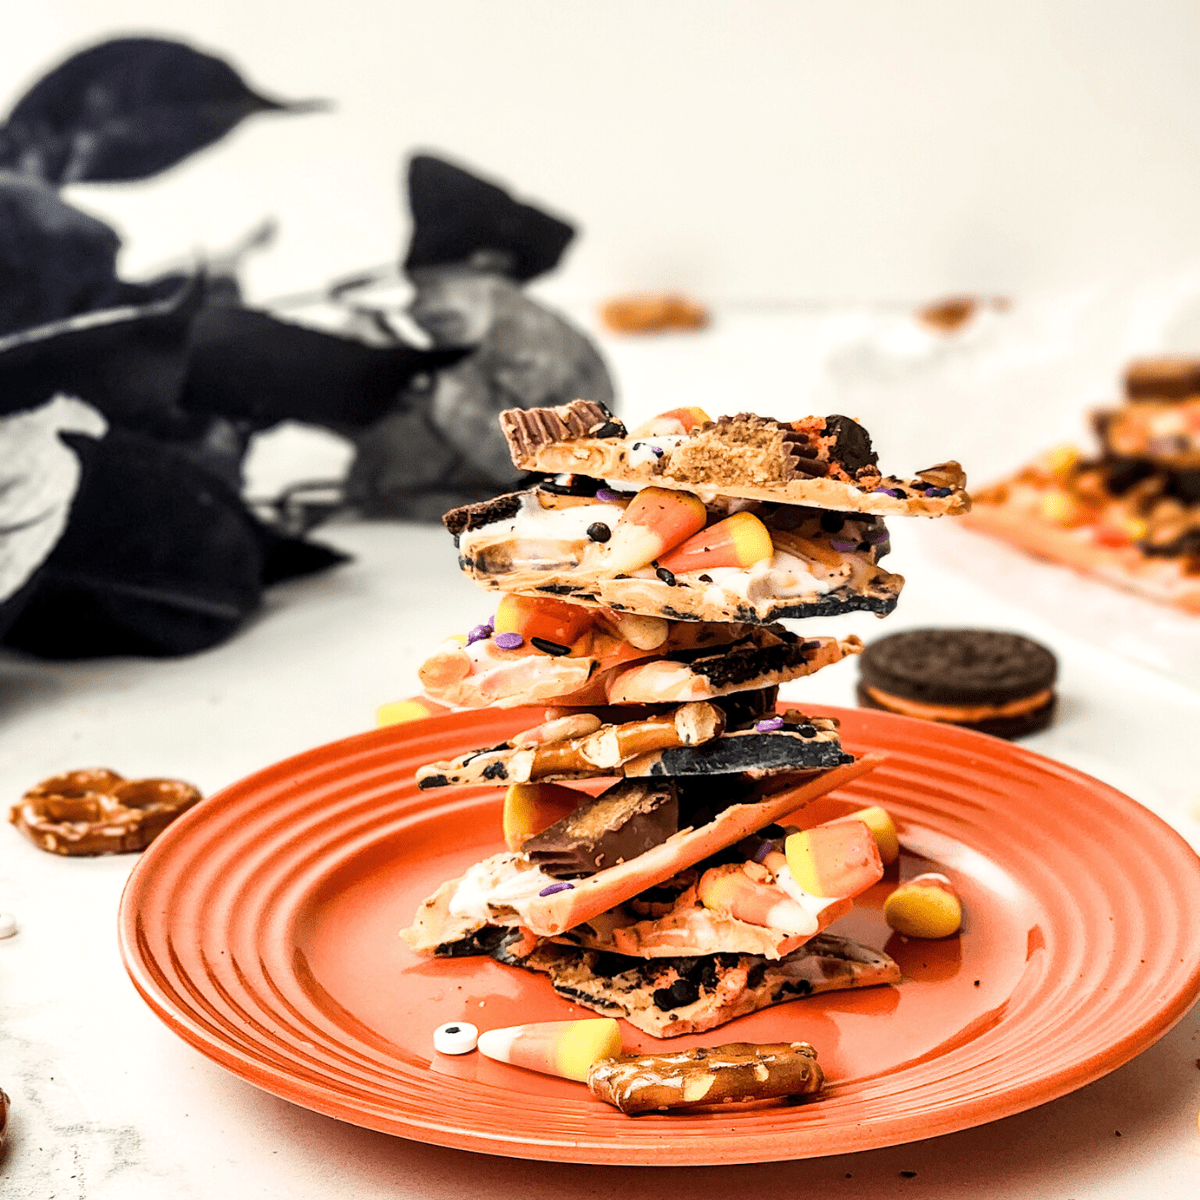
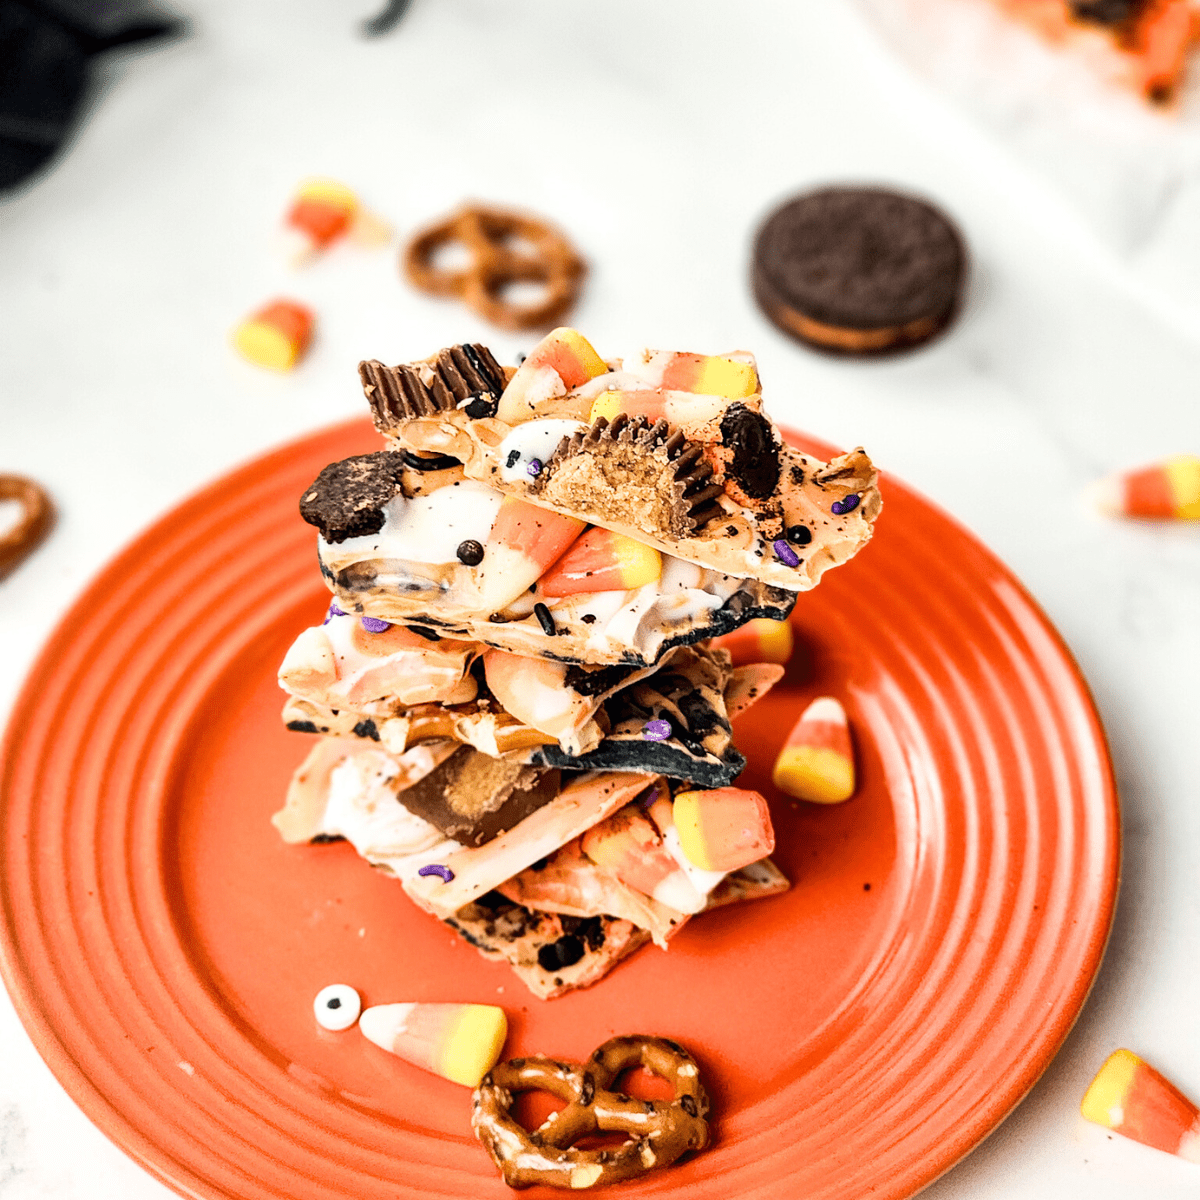
What makes this version stand out is the swirl. Instead of one flat color, you pour orange and black chocolate side by side and marble them together for that instantly recognizable Halloween look. Then you load it up with candy corn, broken pretzels, Halloween Oreos, mini Reese’s, and a heavy hand of spooky sprinkles. The result is sweet, salty, crunchy, and creamy all in one bite, which is exactly what a good Halloween dessert should be.
You do not need to be a pro baker or own any fancy equipment. If you can microwave a bowl of chocolate, you can make this Halloween chocolate bark.

Why This Chocolate Bark Recipe is Perfect for Halloween
There are so many reasons to love this chocolate bark recipe, especially during spooky season.
It gives you a chance to use up leftover Halloween candy or that collection of spooky-themed sweets you couldn’t resist buying at the store. This recipe is flexible, which means you can get creative with your toppings and color combinations.
Kids can help with everything from swirling the chocolate to sprinkling on toppings. And once it sets in the fridge, they’ll love helping you break it into spooky shards of bark.
You can serve this bark at Halloween parties, wrap it in treat bags for boo baskets, or enjoy it while binge-watching your favorite fall movies. It stores well and travels easily, making it a great option for all kinds of celebrations.

Ingredients for Halloween Chocolate Bark
This Halloween chocolate bark recipe fills a standard half sheet pan and makes enough to feed a small Halloween party or fill several treat bags. Quantities are easy to scale up or down depending on how loaded you want each piece.
Chocolate Base
- 12 oz orange candy melts or orange-tinted white chocolate
- 12 oz dark chocolate melts or black candy melts
Toppings
- ½ cup candy corn
- ½ cup Halloween Oreos, broken into pieces
- ½ cup mini Reese’s, halved
- ¾ cup mini pretzel twists, broken up
- 3 to 4 tablespoons Halloween-themed sprinkles
- Optional add-ins: candy eyeballs, Halloween M&M’s, gummy worms
Note: Candy melts work better than chocolate chips for this Halloween chocolate bark recipe because they melt more smoothly and set with a glossier finish. If chocolate chips are all you have, stir in a teaspoon of coconut oil per cup while melting to thin them out and help them spread.
What You’ll Need
- 9×13 baking sheet
- Parchment paper
- 2 microwave-safe bowls (or 1 heatproof bowl and a saucepan if you are melting on the stovetop)
- Skewer, butter knife, or wooden chopstick for swirling
- Airtight container for storage

Step-by-Step Instructions for the Best Halloween Chocolate Bark
1. Prep your pan and toppings. Line your baking sheet with parchment paper, leaving a little overhang on the sides so you can lift the finished bark out easily once it sets. Before you start melting anything, chop or break up your larger toppings so they are ready to scatter the second your chocolate hits the pan. This chocolate bark sets quickly, so prep first and pour second.
2. Melt the chocolates separately. Place your orange candy melts in one microwave-safe bowl and your dark or black candy melts in another. Microwave each in thirty-second bursts at 50 percent power, stirring after each time, until smooth and fully melted. If you prefer the stovetop, set a heatproof bowl over a saucepan with about an inch of barely simmering water and stir the chocolate constantly until smooth, making sure no water splashes in.
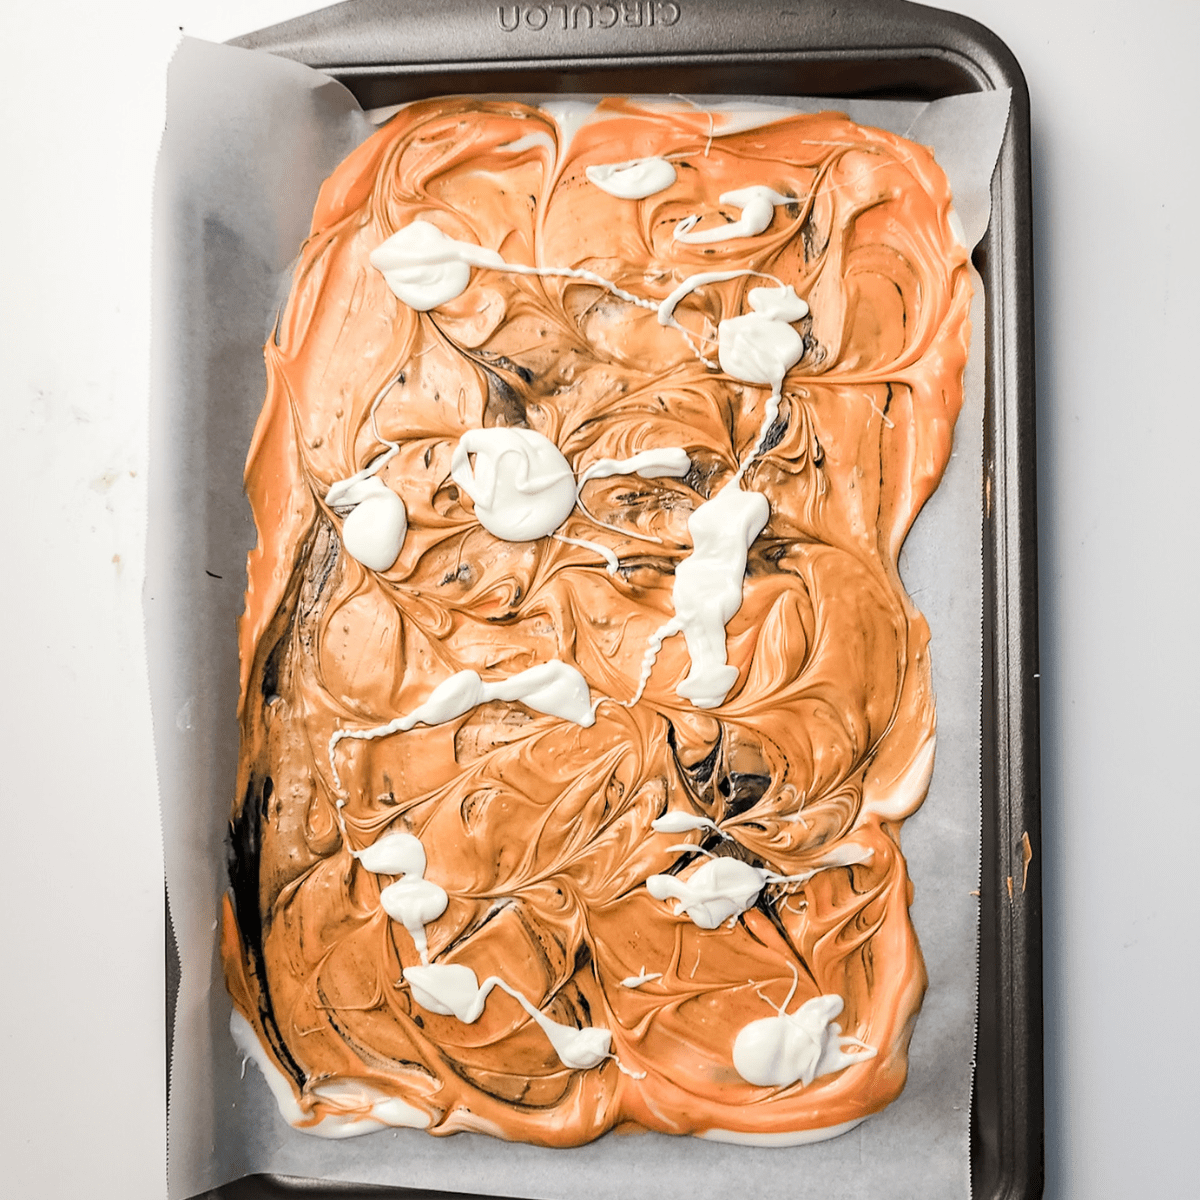
3. Pour and swirl. Pour the orange and black chocolate onto the parchment in alternating sections, almost like a checkerboard. Drag a skewer or butter knife through both colors in long, slow strokes to create swirls. Aim for a marbled look with visible streaks of each color rather than a fully blended mix.
4. Add the toppings. While the chocolate is still soft and shiny, scatter on your pretzels, broken Oreos, halved Reese’s, and candy corn. Press them in lightly with your fingertips or the back of a spoon so they stick once everything sets. Finish with a generous shake of Halloween sprinkles for that last festive layer.
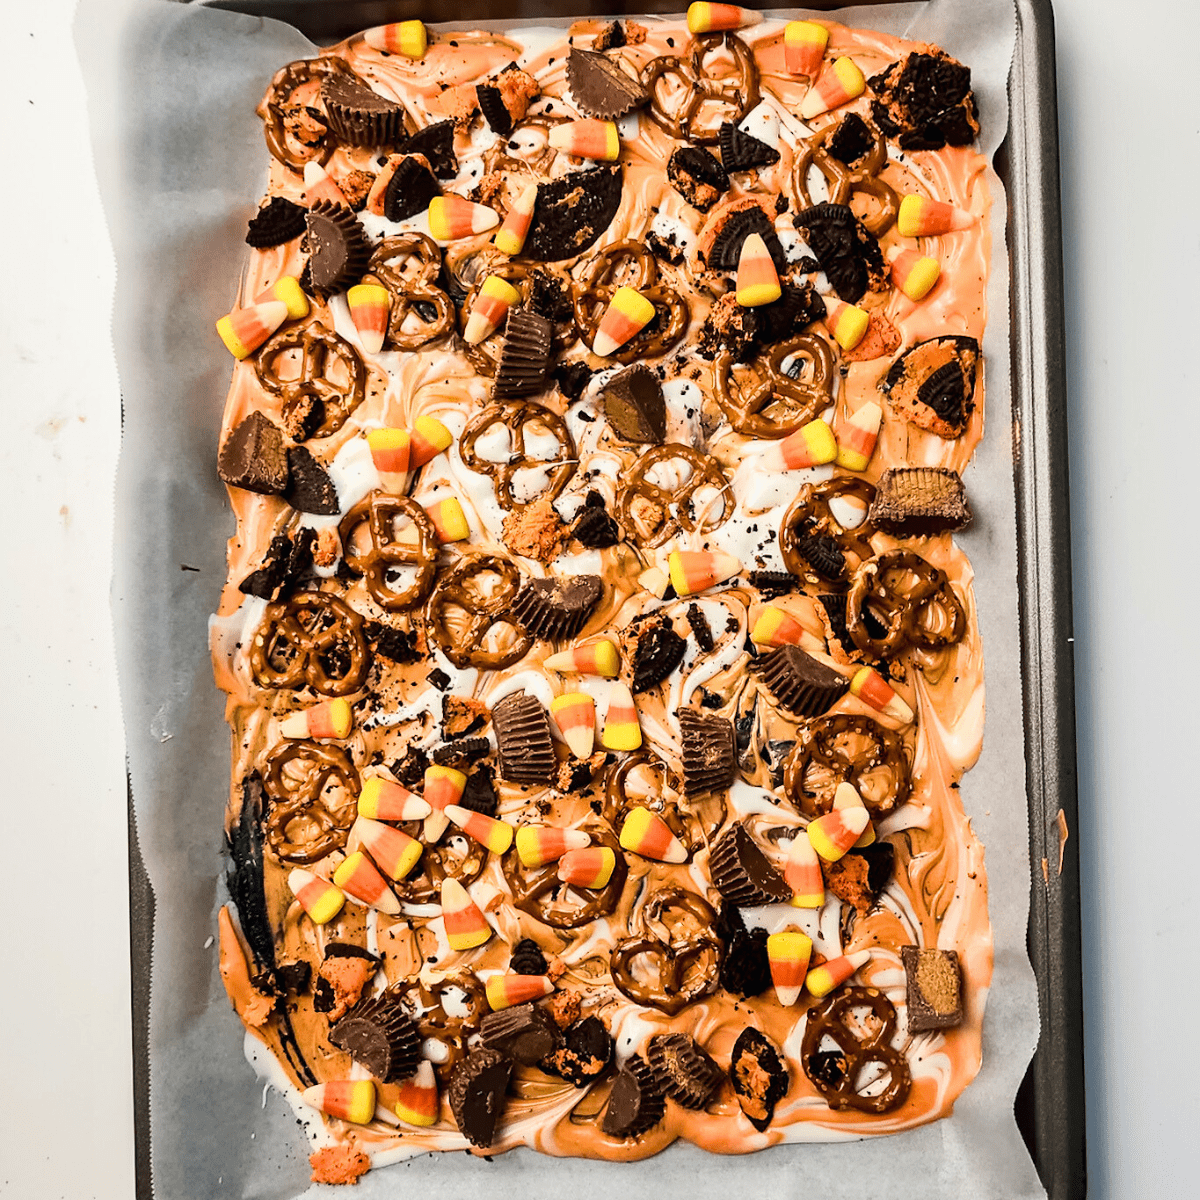
5. Chill until firm. Slide the tray into the fridge and let it set for about thirty minutes, or until the chocolate feels firm to the touch.

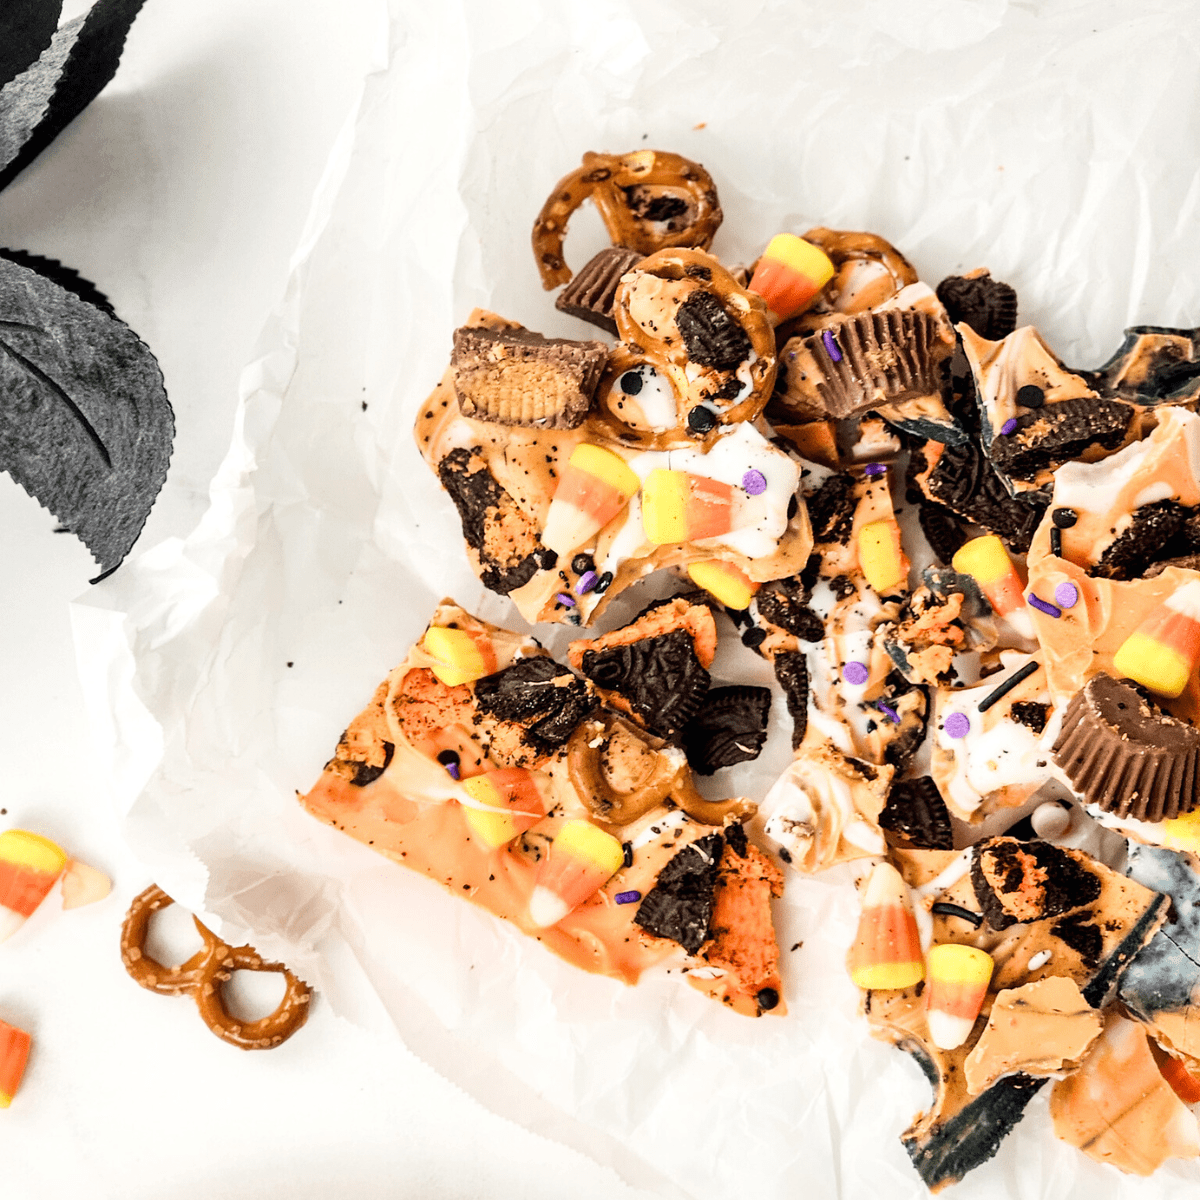
6. Break into pieces. Once fully set, lift the bark out of the pan using the parchment overhang and break it into pieces with your hands or by tapping the edge of a knife into the center.

Tips for Making Perfect Chocolate Bark Every Time
A few small choices make the difference between bark that looks like Pinterest and bark that looks like it had a rough day. Here is what to keep in mind.
Choose the right chocolate. For the smoothest finish and best color, melting wafers or candy melts beat chocolate chips every time. Chips contain stabilizers that keep them from melting as smoothly, which can leave you with bark that feels thick or matte. If chips are what you have on hand, stir in a teaspoon of coconut oil per cup of chocolate to thin it out.
Watch the heat. Chocolate is dramatic. If you overheat it, it gets grainy and dull, and there is no way to really come back from that. Always melt slowly, in short bursts, stirring between each one. The chocolate should look almost melted before you stop heating because the residual warmth will finish the job.
Work quickly. Be sure to work quickly when swirling the chocolate and adding toppings. The chocolate starts setting fast, especially if your kitchen is cool.
Spread it thin. For the perfect snap and the right bite, aim for about a quarter inch of thickness when you spread the chocolate. Too thick and you get a chunky brownie-bar texture. Too thin and the bark cracks into tiny pieces that are hard to plate.
How to Store Halloween Chocolate Bark
Once your Halloween chocolate bark is fully set and broken into pieces, store it in an airtight container with parchment between the layers so the toppings do not stick or shed.
Bark made with candy melts holds up well at room temperature for about a week, which makes it a great make-ahead treat for parties or gifting. If your house runs warm or you used regular chocolate, the fridge is the safer choice and the bark will stay fresh for up to two weeks.
For longer storage, you can freeze the bark for up to three months. Place it in a freezer-safe container with parchment layers, and let it come back to room temperature for ten to fifteen minutes before serving so the texture softens to its best snap.
Sweet Ways to Serve and Gift Halloween Chocolate Bark
This bark earns its keep at a Halloween party as part of a styled dessert board. Pair it with candy apples, popcorn balls, caramel pretzels, and a boozy fall drink for the grown-ups, and you have a spread that looks way more intentional than it actually was.
For gifting, a few pieces wrapped in clear cellophane bags with a black-and-orange ribbon look adorable as a party favor, classroom treat, or boo basket addition. Add a small printed gift tag for an extra touch.
If you are hosting a Halloween movie night, bark works beautifully on a snack tray next to bowls of popcorn and mugs of hot apple cider. It is the kind of treat that makes a casual night feel celebratory without any extra effort.
Fun Variations on This Halloween Chocolate Bark Recipe
This Halloween chocolate bark recipe is endlessly remixable. If you want to switch up the color story, try purple and green candy melts for a witchy vibe, or do a tri-color swirl with black, orange, and purple for a bolder pin-worthy look.
You can also lean fully into the sweet-and-salty angle by adding crushed kettle corn, salted caramel pieces, or a quick drizzle of warm caramel sauce over the top before the chocolate sets. For something a little richer, swirl peanut butter into the chocolate base and finish with chopped peanut butter cups.
The same base recipe works for every other holiday, too. Think red and green for Christmas, pastels for Easter, pink and red for Valentine’s Day, or red, white, and blue for the Fourth of July.
Halloween Chocolate Bark Frequently Asked Questions
- How long does Halloween chocolate bark last?
- This bark will stay fresh in the fridge for about a week if stored in an airtight container. For longer storage, you can freeze it.
- Can I make Halloween chocolate bark with kids?
- Absolutely! This is one of the easiest recipes for kids to help with. They can swirl the chocolate, choose the toppings, and help break it into pieces once it’s set.
- What’s the best chocolate to use for bark?
- Melting wafers or candy melts are best, especially for fun colors like orange or black. You can use white or dark chocolate chips, but they may not melt as smoothly. Add a little coconut oil if needed.
- Do I have to use Halloween candy?
- Not at all. While candy corn, Reese’s, and Oreos are great choices, feel free to use whatever candy you have on hand. The beauty of this chocolate bark recipe is that it’s totally customizable.
- Can I give this Halloween chocolate bark as a gift?
- Yes, it’s perfect for gifting! Package a few pieces in clear cellophane bags with a ribbon or add to Halloween treat boxes for a cute edible surprise.
Celebrate Spooky Season with This Easy Chocolate Bark Recipe
There’s something magical about simple recipes that look like you spent hours on them. This Halloween chocolate bark is one of those recipes. It’s festive, easy, and totally delicious. Whether you’re making it for a party, a school celebration, or just to treat yourself, this bark brings Halloween joy in every bite.
It’s also a great way to get creative with kids and enjoy some seasonal fun in the kitchen. Plus, it’s an easy win if you’re short on time but still want to deliver a memorable treat.
Grab some chocolate, gather your favorite spooky toppings, and create a Halloween treat that’s as fun to make as it is to eat!

